Table of Contents
CMS User Guide for Windows®
Nexus CMS (Content Management System) is a cloud-backed service comprising the CMS desktop application (this guide), web applications and databases provided and managed by CTC Software Inc. CMS can assist with the management of many file types that are most often stored in local drives and folders.
Logging in to CMS with a CTC User Account
About the CTC user accounts
A CTC account is required to use CTC services and applications. An email address and password must be established or provided by an organization that owns a subscription for Nexus (unless using CMS LT). Most users will already have been provided an account to use and will have received either the specific username and password or an email with an account activation link.
Security Best Practices
- Log out or lock the desktop when away from the workstation.
- Use strong passwords containing punctuation (!$%&), numbers, letters and mixed cases.
- Do not use passwords from other accounts.
- Do not share account information.
- If account information must be shared (for example: tech support), use a new password.
Getting Started by Logging In
Steps to Log In with a New Account
- A welcome email will be sent to the email address specified as the account username. Click the link in the email to complete the process.
- A log in screen will open in the web browser. Enter the username (email) and temporary password (if provided).
- Enter a new password following the best practices.
- Confirm the new password by typing it again.
- If successful, a message will indicate that the new password has been set.
- Close the browser and find the CTC CMS application in the Windows Start Menu.
- Use the credentials from the previous steps to log in to the application.
Steps to Log in Using an Existing Account
- Find the CTC CMS application in the Windows Start Menu (or on the desktop) and run it.
- A log in screen will appear. Enter the email address and password associated with the account.
- Type the password for the account and click “Sign In”
Resetting a Password (Forgot Password)
This function can be used to change a password as well.
- If not logged out already, log out of the application by clicking the username in the upper-right and choose “Sign Out”.
- When the Sign In dialog appears, enter the email address for the account.
- Click “Forgot Password”. A message stating “We’ve just sent you an email to reset your password” will be displayed.
- Check the email account for an email from noreply@ctcsoftware.com. This may take up to 15 minutes, depending upon your company’s email service. If it does not arrive, check the spam folder in the email program.
- Click the link in the email. It will open using the system’s default web browser.
- Follow the prompts to specify a new password.
- Upon successful change, go back to the Sign In screen for the CMS application and enter the new password.
User Preferences and Settings
Once successfully logged in to the CMS application, click on the username in the upper-right corner of the window and choose ‘User Settings’.
- Log frequency:
- Errors Only (recommended default)
- Errors and Warnings, Verbose – will cause log file sizes to become large.
- Number of items to display in searches: 25 (recommended for best performance). Any value between 10 and 100
- [_] Enlarge preview on mouse hover 150% ——– 300% : check the box if larger preview are desired when the mouse is above the image of a content item. Use the slider to adjust the amount of enlargement.
- [✔] Notify if update is available on login: uncheck this to disable optional software update notification. This does not apply to mandatory updates.
- [✔] Display type selector dialog when loading Revit family: a type selector will be shown every time. This can also be turned off from the type selector dialog.
- [✔] Display view selector dialog when loading Revit sheets: a view selector will be shown every time. This can also be turned off from the type selector dialog.
- [_] Remember Main Window startup position: Setting this will set the window position to reappear at the position on the screen that it had when closed. This can sometimes cause it to open off-screen if it was closed on a screen that is no longer connected to the workstation.
- Default Sort By: select the field to sort search results by default
- Saved Search Dropdown List Count: defines the length of the saved search quick list (upper left on title bar of app)
- Caching: the CMS app caches content in temporary locations on the system drive in order to speed up the loading of items that have already been used. The folder can safely be cleaned occasionally if desired either by manually deleting the files or by clicking the ‘Clear Cache’ button.
The settings chosen here are stored with the CTC account.
The Home Screen

The Home screen is a starting point for finding content. It contains a list of shortcuts configured by the administrator of the CMS. The tiles shown above may not match exactly, depending upon the organization configuration.
Each tile, when clicked, will navigate to a list of available choices under that subject. For example, when ‘Libraries’ is clicked, a list of libraries for which the user account has access will be presented. Drilling down further will display 25 content items, or more, depending on the “Number of items” setting.
The same logic applies for the other tiles. These tiles are simply applying filters to a search. Notice that once the tile is clicked, it switches the interface over to ‘Search’.

The result that is shown will contain the number of items that was specified in user settings. If there are more items than the number specified, continue scrolling to get another set.
Home Filters
If desired, pare down the list of tiles displayed by using the filter box. This is helpful to reduce the list of items to a manageable size.

In this example, the beginning characters of “Electrical” were entered, reducing the list of items to those beginning with ‘Ele’.
Delete the characters in the text box to return to the full list.
The filter box is a common element throughout the interface. In most cases, it is used when there could be large numbers of items, making things more difficult to find.
Refreshing the View
Occasionally it may occur that a new library or tag has been created and used in the CMS but it is not being displayed in the shortcuts. In this case, it is necessary to “Refresh” the list to get a new set of items. To do so, click “Refresh” next to the filter text box.
Returning to the Previous View
On most of the views in the CMS app, particularly those that navigate two or more click inward, there is a back arrow that is used to return to the previous view.
For example, starting at Home, click into Tags (if available). Then choose a tag tile to click one more level in. This presents the search view.
From here, to get back to the list of tags, click on the home button. Then, in home, next to the Tags label in the upper-left, there is an arrowhead or “chevron” (`<`) icon. Clicking on this will return to the previous view.

This is a common navigation method throughout the CMS application.
About CMS Libraries
Libraries in the CMS are logical containers of content. There are three kinds of libraries:
- Organizational Libraries - these are the most common. They are libraries that an organization creates for their own users. They are listed only if the logged in user has been granted access by an admin.
- Subscription Libraries - these are libraries that have been made available to all organizations within CTC CMS. These libraries are read-only.
For more information about library management, go to the Online Guide.
Searching
Searching within the application is the primary means of finding and using content items. The engine the CMS uses is “adaptive” meaning that it is continuously optimizing based on how users conduct searches, whether content is used, the terms and filters that are applied, the ratings of items, etc. This means that as more searches are performed, the results should continue to improve their relevance and users will find what they are looking for more often.
Search Basics
The input for search is always prominent and accessible at the top of the application window. To use it, simply type a word and hit the enter key. As a term is entered, a list of suggestions from other searches and similar terms will be shown as a list below the search box.
Clicking on one of the list items in Categories will perform a search using that term.

Choosing one of the terms from another group will perform a filtered search based on that choice. For example, using the word “mechanic” in the search box shows a list containing the group Tags. Choosing the DI-Mechanical item in the list will find all of the content with the DI-Mechanical tag associated to it.

This is a good example of the value that Tags can provide. There are no families named using “DI-Mechanical” yet the items tagged with the term can still be easily found.
Filtered Searches
To refine a search by more than just the matching term, use the ‘Filters’ panel. Filters work on more than just the names of content. The content ‘metadata’ properties are used to filter out less relevant items.
To use filters:
- Click the filter count button to open the panel.
- Choose one or more libraries to search.
- Select the appropriate properties from the lists. This will remove anything that does not have this property and value from the search results.
- Click apply to re-run the search with the selected filters.
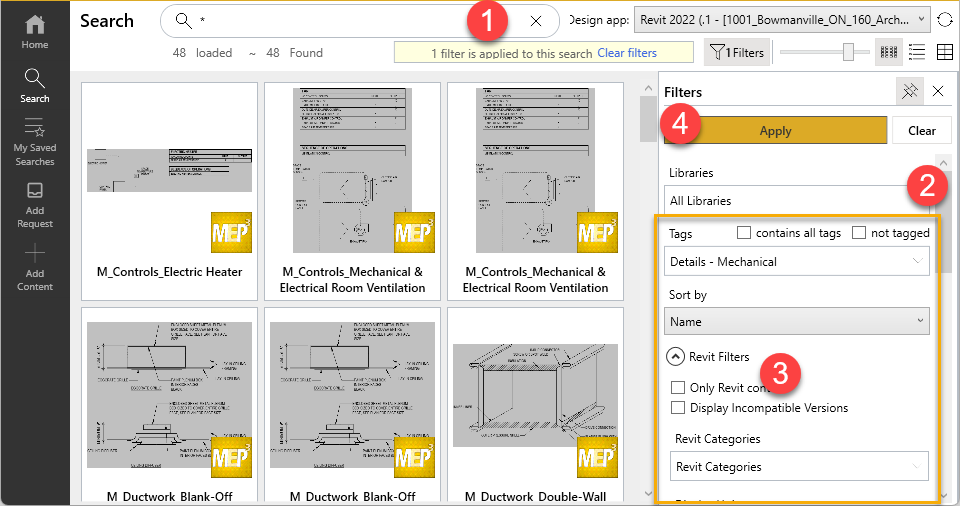
The application will display a message at the top of the result window indicating that a filter is applied to the search. To remove the filters applied, open the filter pane again and click “Clear” to remove all filters or deselect any properties as desired.
Pinned Libraries
In the list of libraries on the filter panel, the “Pinned” feature can be set to show often searched libraries at the top of the list. Simply click the pin icon before the name to set it to the top.

Saved Searches
Saved searches are a means to quickly re-run frequent searches without needing to re-specify search terms, property filters or libraries. Once created, saved searches are stored along with the user account, making them available anytime.
To save a search, first perform one or configure a filtered search. Next, click the “Save” icon from the toolbar next to the search box.

Now, click the “Saved Searches” button to the left of the search box. The newly created search should appear in the list.

Personal saved searches are only visible to this user account. Company Saved Searches will display the group icon next to them. These are configured by the organization admin.
Editing Saved Searches
To redefine or change a saved search, first run it. Make the desired changes to the search and click the save icon. Choose Overwrite and select the desired search from the list. Click save.

Managing Saved Searches
To see and manage saved searches, click the “Saved Searches” icon from the navigation bar at the left. If some recently created searches do not appear in the list, click the refresh button. Select a search to work with it.
The available operations are:
- Execute – shortcut to run the search
- Edit – Change the name and description
- Delete – Completely remove the saved search (not recoverable!)
- Refresh – gets the latest list from the cloud
Search Types
All search strings leverage:
- The Original File Name
- The 6 optimized search names
- Original File Name with different combinations of symbols stripped and replaced with spaces
- Type Names
- Parameter values:
- Can be filtered to only search specific parameter values, company-wide, by BIM Managers
- Associated Tags
- Revit Category
Essential Search:
Any values in the search box will be evaluated as ‘or’ values
`Swing Single`
Evaluated as searched fields contain ‘Swing’ or ‘Single’ or ‘Swing Single’
“Search Value” is an explicit search. The exact string must appear in the searched fields
`“Swing Single”`
Evaluated as searched fields must contain Swing and Single in that order
Boolean Searches:
* `+` (plus) is an ‘and’ operator - `Swing + Single`
* `-` (hyphen/subtract) Is a ‘not’ operator must be separated with a space before
`Swing -Single` - This search will work
`Swing-Single`
This search will act as a basic search and the `–` will be stripped unless string is surrounded with “”
`|` (pipe) is an ‘or’ operator *Redundant but does help with reading for some people*
`Single | Double`
Same as
`Single Double`
`( )` Can be used for grouping above operators
`Single –(Swing | Double)`
Same as
`Single –(Single Double)`
WildCards:
`*` (asterisk) Wildcard for any characters in the place of the asterisk `?` Wildcard for a single character in the place of the ?
Boost Option:
`^#` will help to boost a single word in the search making that work carry more weight
`Single Door^2`
Single is searched and Door is searched
Relevance granted to items containing `Door*2`
Content ID (advanced feature)
Administrators can use a ContentID from the content export reports to search for a specific content item.
Content Requests
The request feature is enabled by default and can be disabled by the administrator. In addition, the option to "Enable content requests" must be checked in CMS settings.
Use the Requests system to request content or changes to content. The request is managed through the portal. A request can help organization and library admins respond and handle user requests more efficiently.
The “Add Request” button, when clicked, will launch a browser directly to the “My Requests” page.

Prior to viewing the page, a login may be required. Use the same email and password that is used to log in to the CMS application.
To learn how to create and follow requests, refer to the user guide here: CTC Requests User Guide
NOTE: An alternative URL for making requests can be specified. If this button does not direct to the CTC Requests system, please check with your organization CMS manager for information on how to make requests.
Content Attachments
Add files such as PDF, images, text, etc. as attachments to content. This is useful when more information about a content item is needed.
Select the content item, open the details pane and expand “Attachments”.

Files and links to files or internet locations can be attached to content.
*Choose the type of attachment desired:*

Content Revision History
If a content manager chooses, a comment can be added each time the content item is updated. The history of comments will be available in Content Details –> Content Properties –> Revision History.

Sharing Content Links
When it's useful to share a list of content with other users in your organization, use this feature.
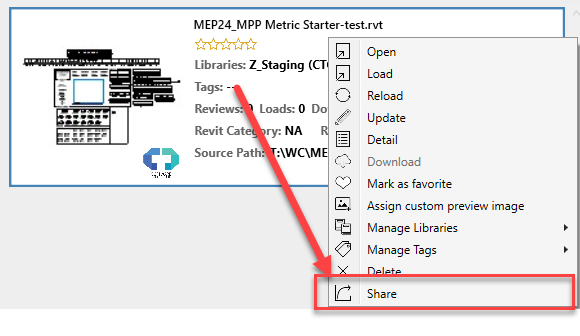
Select one or more items in a search result then right-click on one of the items and choose Share
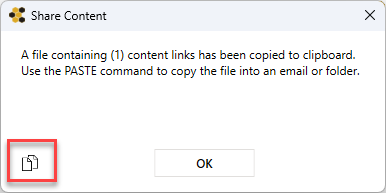
The application will copy HTML data to the Windows clipboard
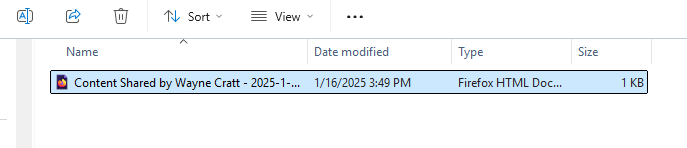
From here, two methods can be used to share the links data. One is to simply right-click/paste into a folder. This creates an HTML page that can be viewed in any browser:
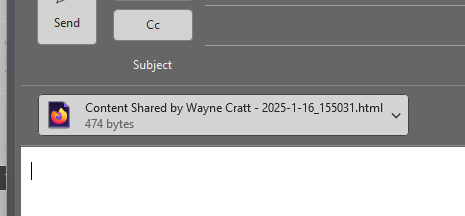
Another method is to right-click/paste into the body of an email (Outlook is used in this example):
Favorites
Use this feature to create shortcuts to frequently used content items in the Favorites list. To add an item to favorites, right-click on it to bring up the context menu and choose “Mark as favorite”

Access the favorites list from the home screen on by clicking the heart icon at the top.
Feedback
If available, feedback on features or reporting of bugs can be quickly sent to CTC using this function.

Use the form and be as descriptive as possible. This will help CTC determine how best to address the feedback.
Reviews
Select a content item and open the details. There, if enabled, will be a list of reviews and a button to submit one to the content manager(s)

Pin Window (Make Always Visible)
Keep the CMS application on top of all other applications

Using the CMS with Desktop Applications
Working with Content
To open a document from the CMS, double-click the item. The default program for the file extension will determine which program the document is opened with.
To choose some alternate actions, right-click on a content item to bring up the context menu.
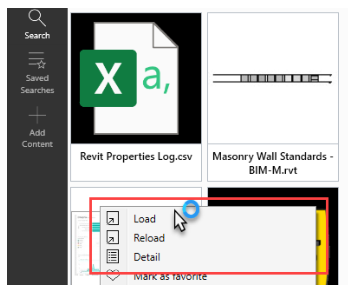
Depending upon the content and user role, some of the actions may not be available.
- Load – opens the document in its associated program
- Reload – for documents other than Revit types, this does the same as ‘Load’
- Detail – opens the content details
When content is loaded or reloaded, the application first downloads a copy of the file from the cloud (or local share if available) to a temporary location on the workstation. It then hands the opening of the file to Windows which, if specified, uses the appropriate application to view or edit the document.
For example, if Microsoft Word is installed and set as the default application for .docx files, Windows will start Word up and load the document.
If desired, edit the document as usual. Use the ‘Save As’ function to save the document to a different name and location.
Note that editing and saving a document in this manner does not update it in the CMS.
Default Application Settings
To set the defaults by file type:
- Search the start menu for “Default Apps”.
- Click “Choose default apps by file type”
